Updating to the latest version
The Asprova My Schedule module is updated once or twice a month. What each update contains is published in the release notes.
To use newly added features and to pick up bug fixes, update the My Schedule module to the latest version.
Updating the Asprova My Schedule module does not lose the project settings or user settings stored on the server.
Updating has up to three parts: the module, the plugin, and — sometimes — re-uploading your data.
Update the My Schedule module
Use the [Check updates] button at the bottom of the Control Panel. It opens the update dialog, which the Control Panel labels Online Update (experimental feature).
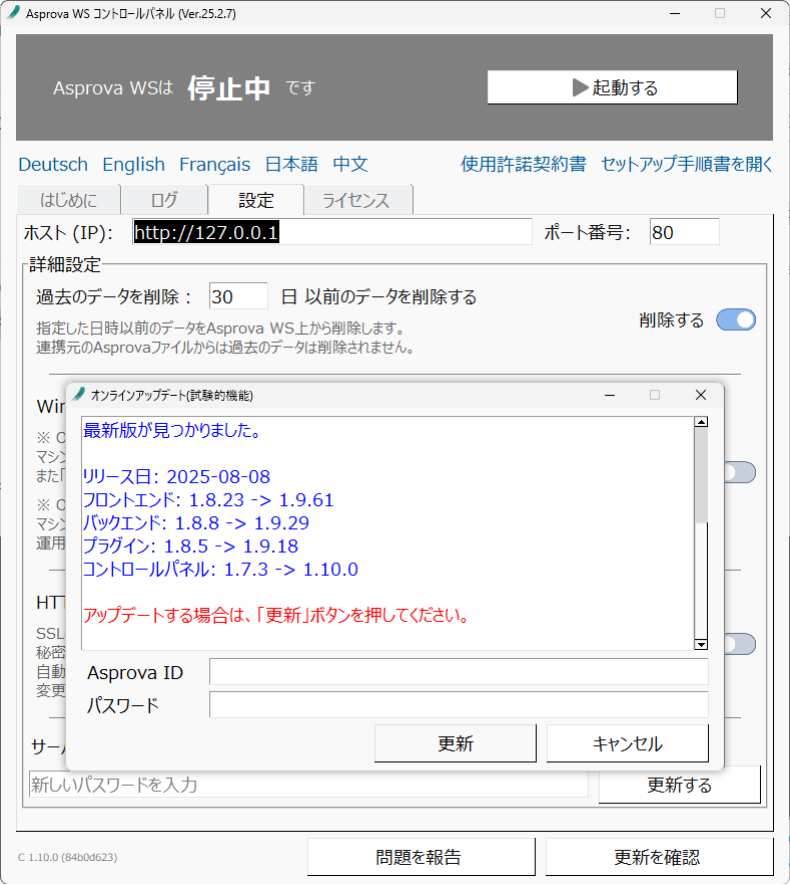
- Online updating needs an internet connection.
- Fetching version information works while Asprova WS is running, but applying an update needs it stopped. If WS is running, the dialog says "Asprova WS needs to be stopped before update" and the update controls stay hidden. (Checking without stopping is available from 26.1.4; before that the dialog required WS to be stopped to check at all.)
Press [Check updates] in the dialog to fetch the latest version's details.
If a newer version is found, enter your Asprova ID and password and press [Update]. The update then runs automatically. Your credentials can be saved for next time, and cleared again from the same dialog. (From 26.1.4.)
If the online update does not complete, or reports an error, update manually instead.
Update the plugin
Having updated the module, update the My Schedule plugin (AsMySchedule.dll) that Asprova loads.
Quit Asprova if it is running.
Go to the folder where Asprova is installed and overwrite the existing AsMySchedule.dll with the
new one from the updated folder's Plugin folder.
The plugin's bit count has to match Asprova's.
Paste this into Explorer to open the 64-bit folder:
C:\ProgramData\Asprova\Asprova My Schedule\release\Plugin\64Bit
It contains AsMySchedule.dll. Copy that file into the same folder as Asprova.exe:
C:\Program Files\Asprova Corporation\Asprova
Once overwritten, start Asprova and confirm under [Help] → [Plug-in Information] that
AsMySchedule.dll's version is the new one.
Updating the plugin sometimes means the My Schedule connection settings have to be set again. Open [Tools] → [My Schedule Settings] from the menu bar and check what is configured there.
Re-upload your data
An update sometimes requires the data to be uploaded from Asprova again. When it does, My Schedule says so:

If you see that message, re-upload using the new version of the plugin.
Still seeing the old version in the browser after updating? Press Ctrl+F5 on the My Schedule page. If that does not help, clear your browser's cache.