Updating manually
This procedure is for anyone running a very old version of My Schedule, or hitting problems with the Control Panel's online update feature.
If the online update does not complete, or reports an error, update the My Schedule module by hand as follows.
Download the latest version
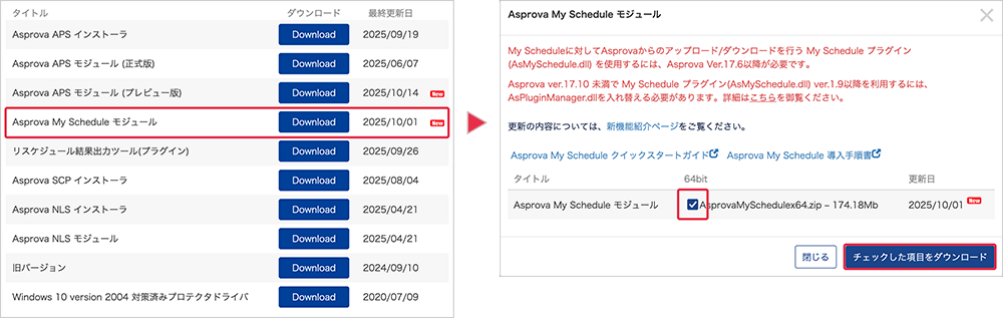
Go to the download page on the official site, and download and unzip the latest My Schedule module from the list. An Asprova ID is required.
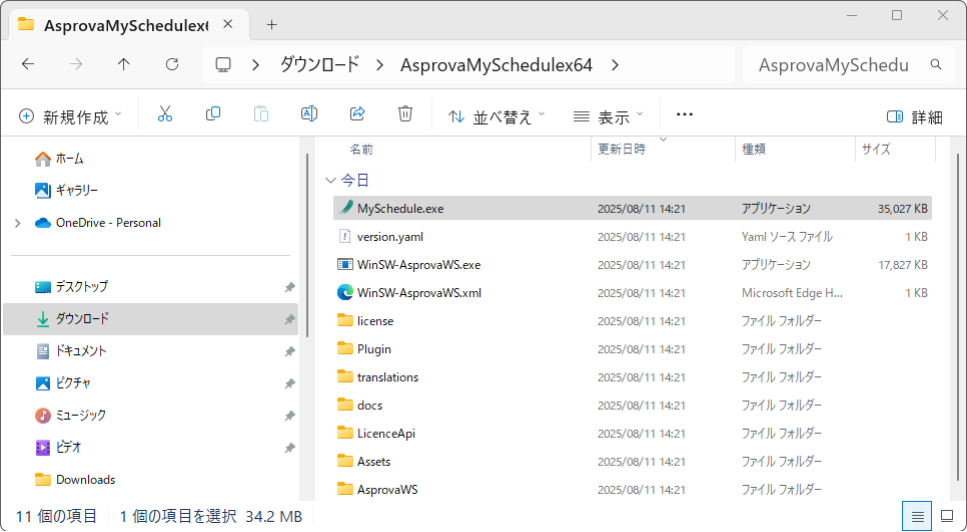
The unzipped folder contains a number of folders and files. These are what will replace the old version.
Delete the current My Schedule
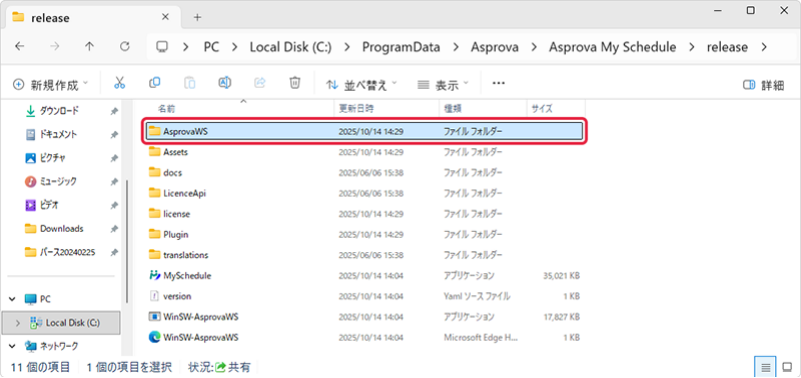
Open Explorer, paste the following path into the address bar and press Enter:
C:\ProgramData\Asprova\Asprova My Schedule\release
The release folder opens, showing the currently installed My Schedule files.
Delete the Asprova WS folder inside release. That removes the old My Schedule files.
Copy the new files into the release folder
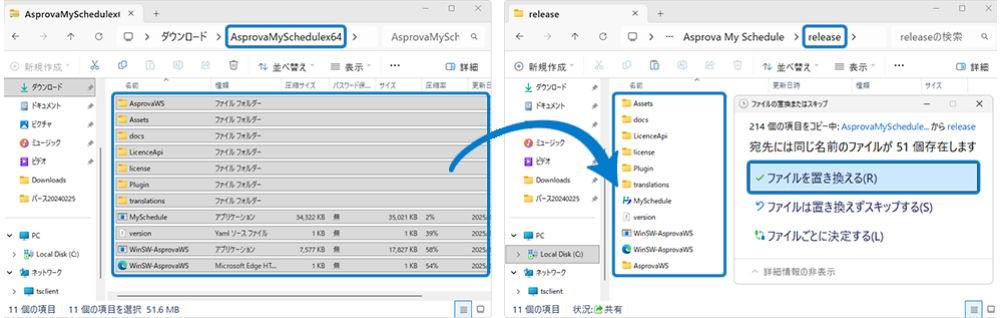
Select everything inside the downloaded My Schedule module (the AsprovaMySchedulex64 folder)
and copy it with Ctrl + C.
Go back to the release folder (C:\ProgramData\Asprova\Asprova My Schedule\release), paste with
Ctrl + V, and choose [Replace the files in the destination] to overwrite.
That completes the My Schedule update.
Then:
- Update the plugin Asprova loads — see Update the plugin.
- Re-upload your data to My Schedule if it is needed — see Re-upload your data.
If the problem persists, contact support.