Set up a license
My Schedule can authenticate a license in two ways: with an e-Protector, or with an online license. You set either one up from My Schedule in the browser, so sign in with the administrator account first.
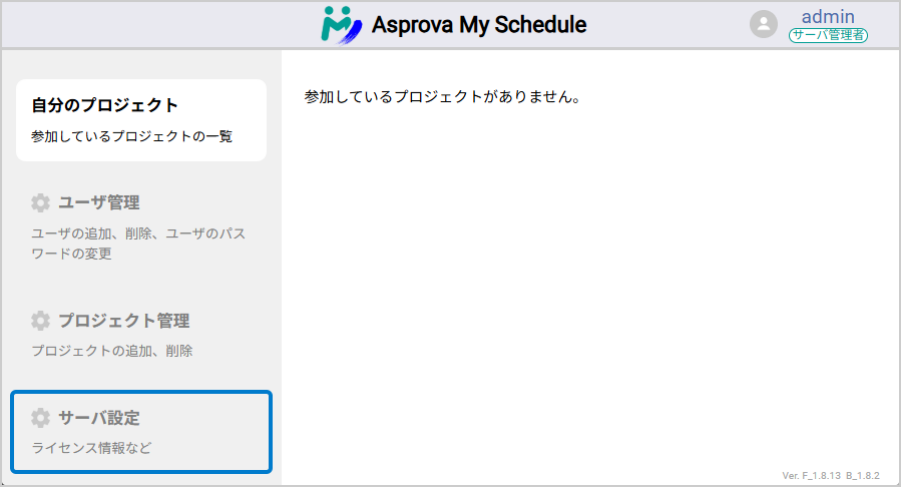
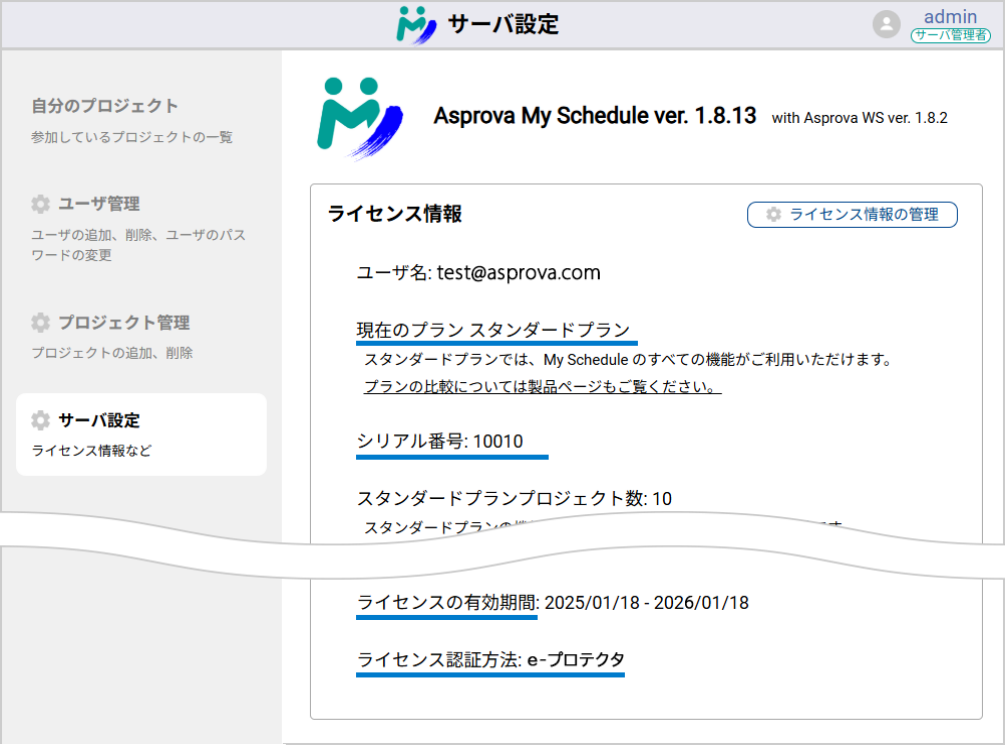
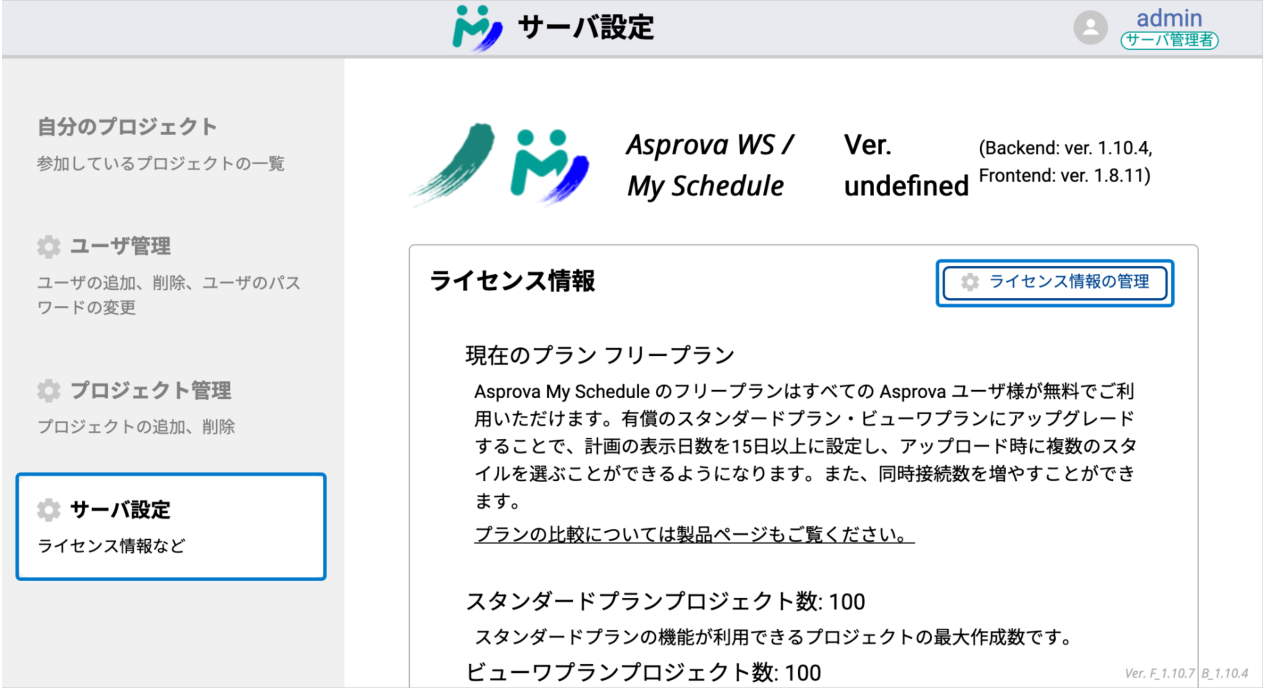
Select [Server settings] to see the current licensing status.
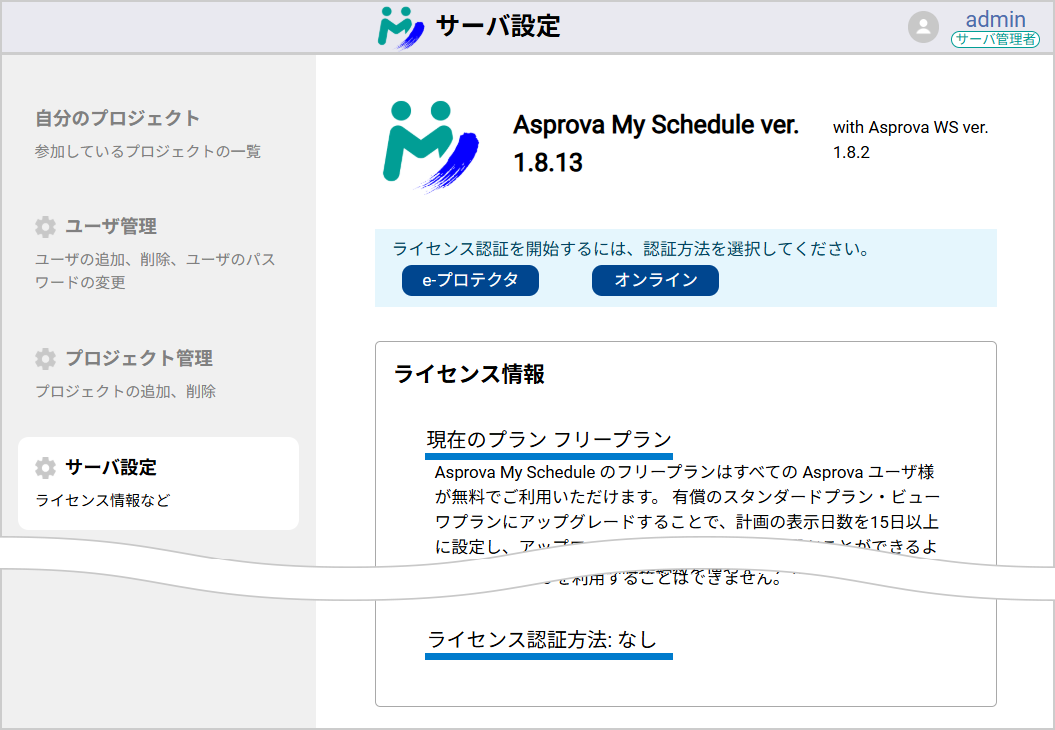
When the licensing method reads none, only the Free plan is available. That is enough to try My Schedule out — you can come back and license the server later.
From 26.1.10 this panel is laid out differently: values are aligned in a label/value list with status chips for the plan and the authentication method, and a WS license's sub-licenses appear as per-product cards showing their concurrent users (CCUs), standard- and viewer-plan project counts, and named users. The screenshots on this page were taken on an older release and show the previous layout — the buttons and the procedure are the same.
For what a license actually grants, see Licensing.
e-Protector
The e-Protector method installs an electronic file (the e-Protector) that records the license information onto one machine.
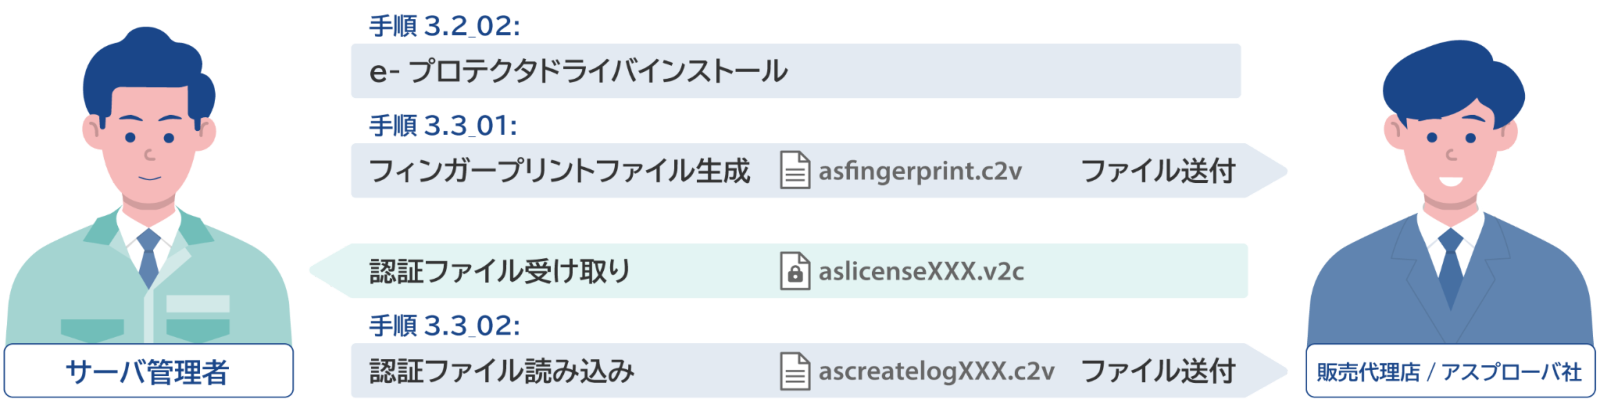
Obtaining an e-Protector means exchanging files between the server administrator and Asprova Corporation via your distributor, so allow several days for the procedure.
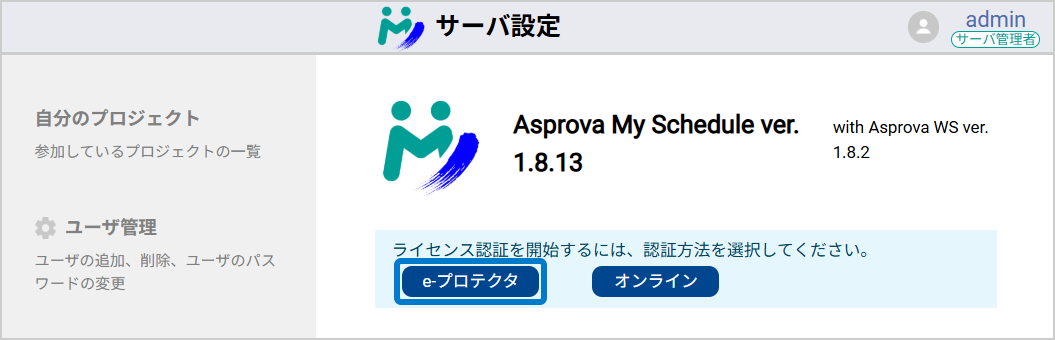
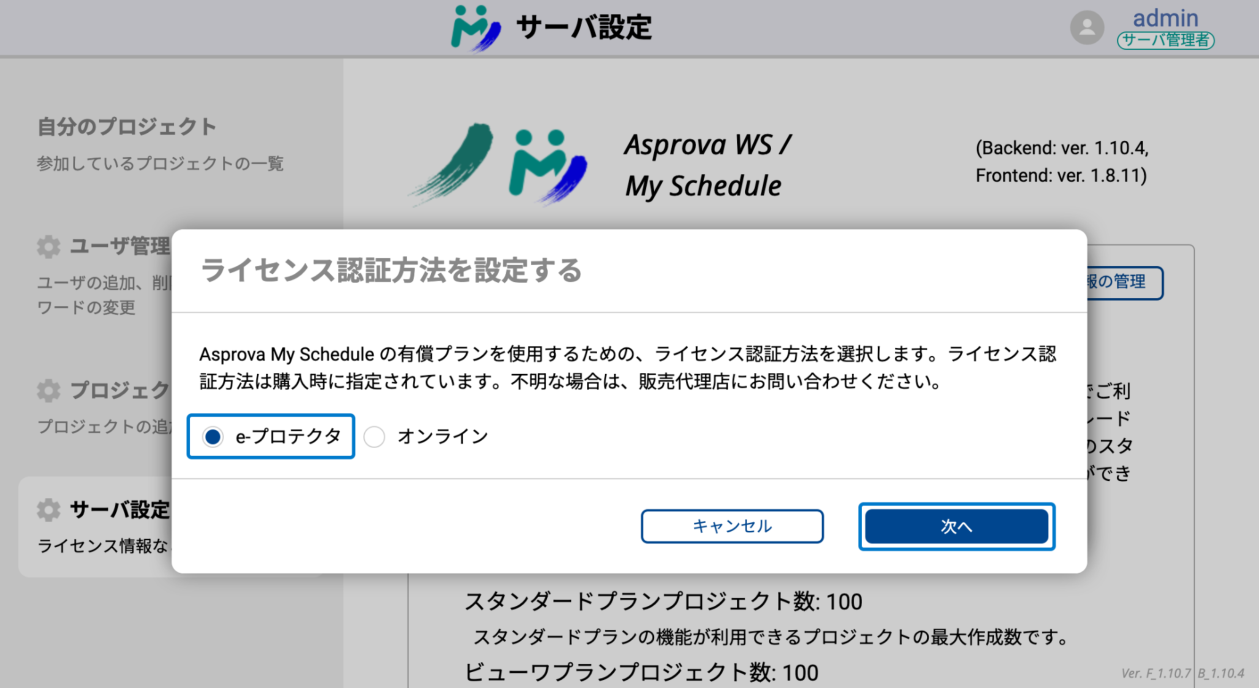
Choose [e-Protector] from the licensing method selection on the server settings screen.
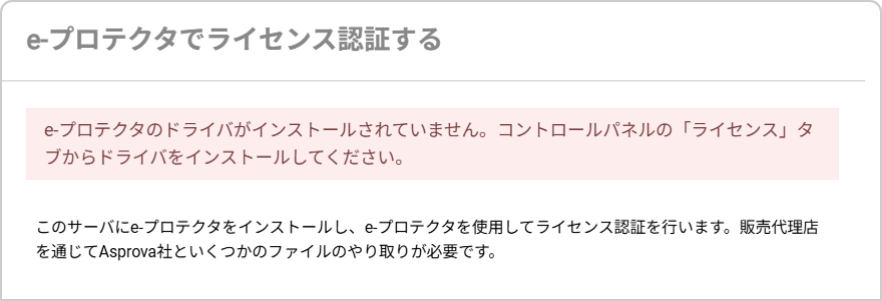
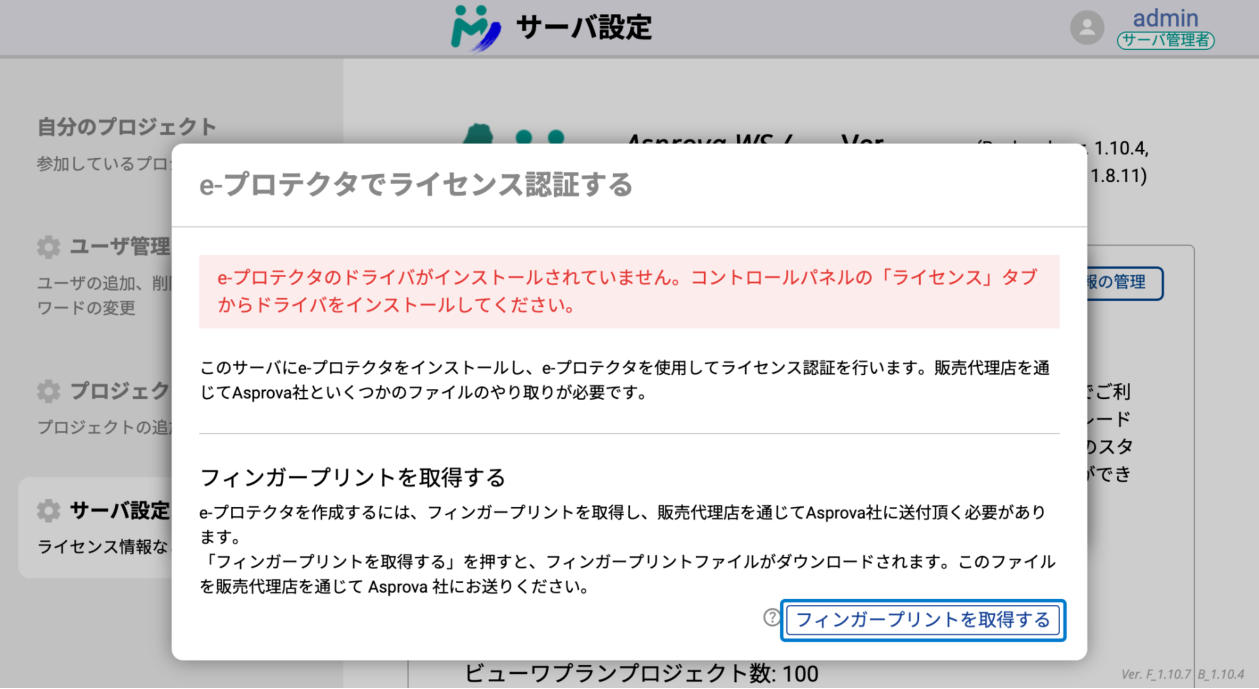
If the window shows a message in red like the one below, the e-Protector driver has not been installed yet. Install it from the WS Control Panel as described in e-Protector driver, then come back here.
Get a fingerprint file and send it
Press [Get fingerprint] in the window that opens from [e-Protector].
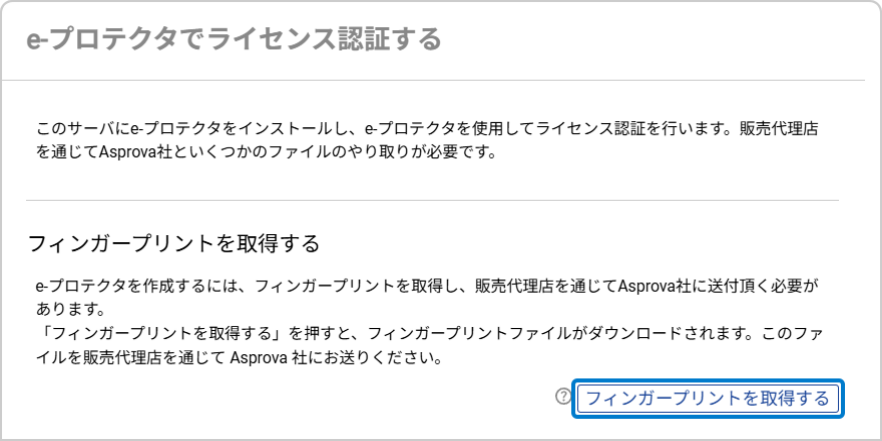
A fingerprint file recording information unique to this machine is downloaded, named
asfingerprintXXX.c2v.

Send that file to Asprova Corporation through your distributor. Asprova issues a certificate file carrying the license information, which you receive back from your distributor.
Apply the certificate file
Press [Apply license file].
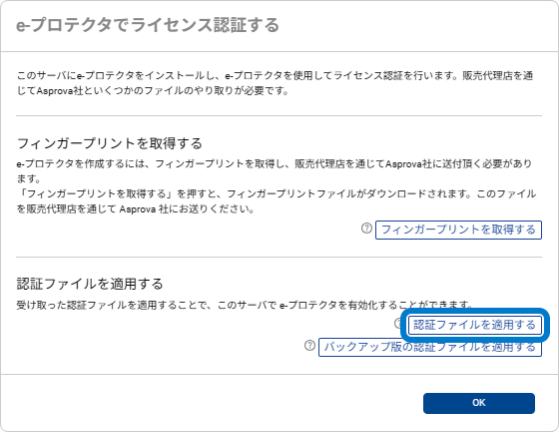
A file selection window appears. Press [Choose file] and select the certificate file, named
aslicenseXXX.v2c (XXX being the serial number).
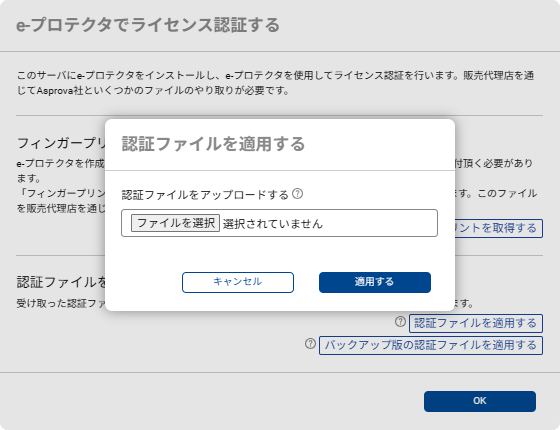
Press [Apply]. When the success dialog appears, e-Protector authentication is set up. The server settings screen now shows the plans available to you, the number of concurrent users, the expiry date, and so on.
Applying the certificate file also downloads an e-Protector creation log file named
ascreatelogXXX.c2v. Send this file to Asprova Corporation through your distributor — the
procedure is not complete without it.

Renew with a magic number
Asprova My Schedule is licensed on an annual contract. When you renew the contract, you keep using My Schedule by updating the e-Protector authentication information with the magic number you receive from Asprova through your distributor.
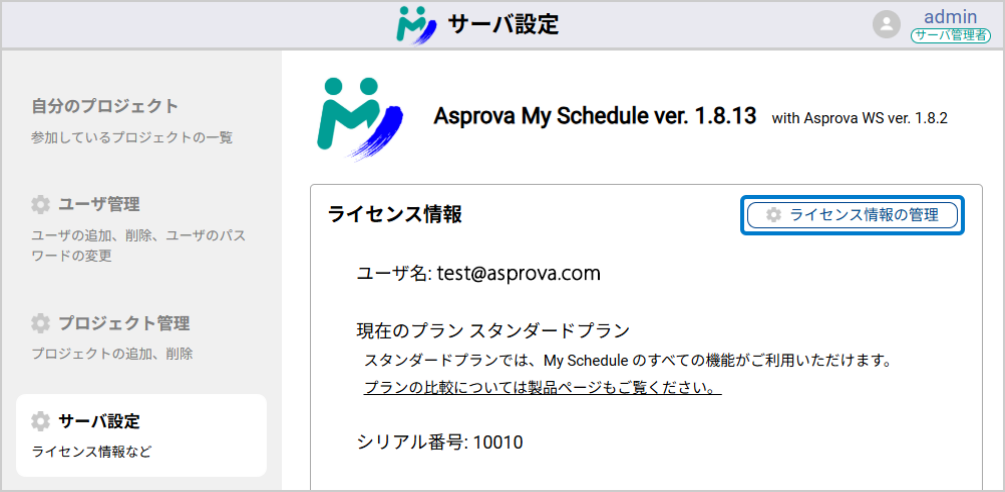
Press [Manage license information] on the server settings screen.
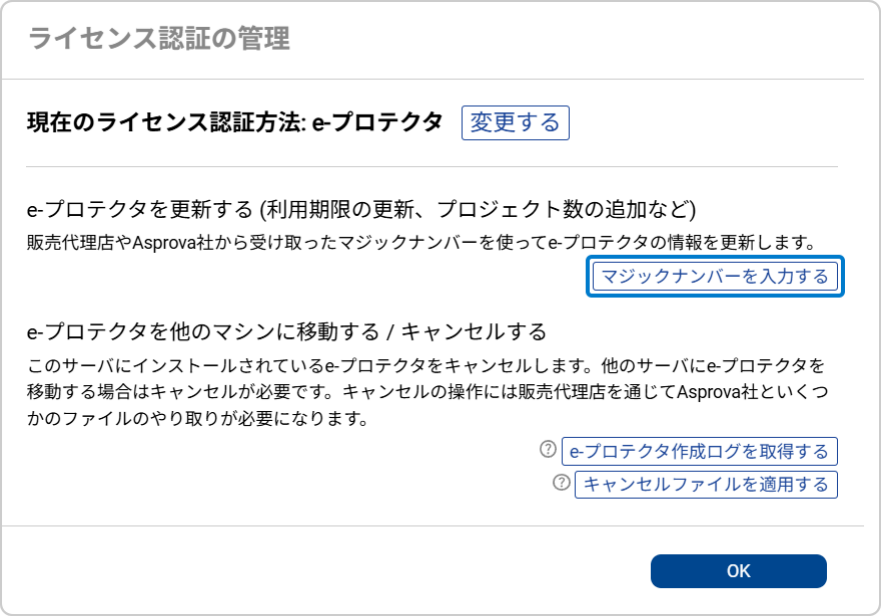
The window that opens has an [Enter magic number] button.
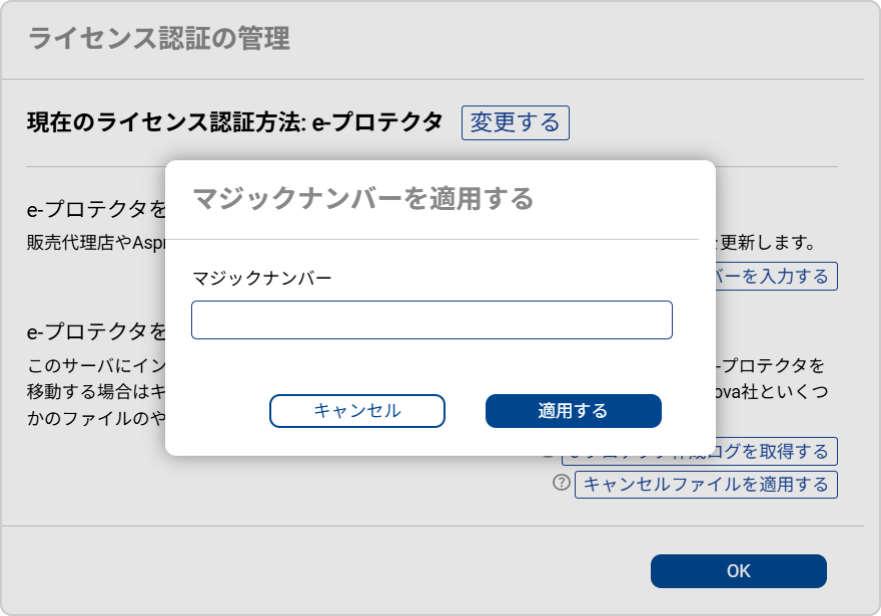
Enter the magic number you received and press [Apply].
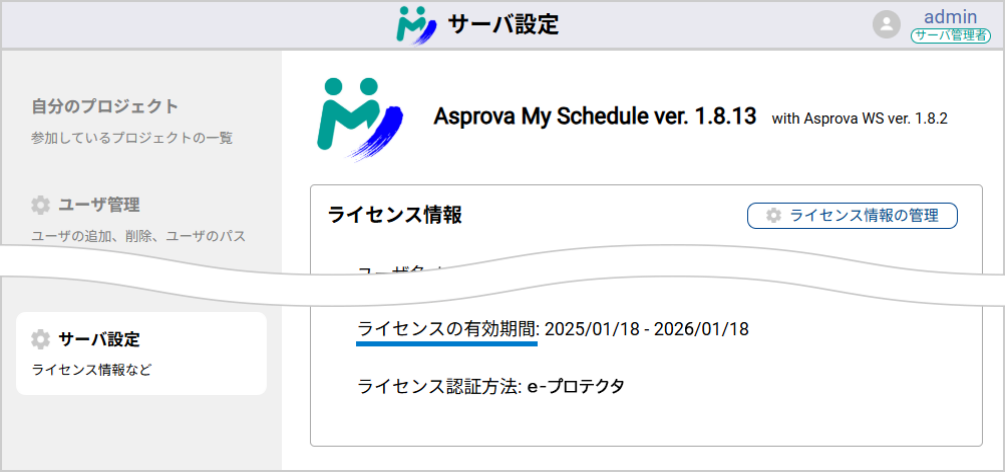
Press [OK] at the bottom right to close the window. Check the license validity period — it should now be extended.
Prepare a backup e-Protector
Backup e-Protectors are available in My Schedule ver.25.3 and later.
An e-Protector licenses one machine, so if that machine fails, My Schedule becomes unusable. For that situation we provide a backup e-Protector alongside the regular one.
Prepare a second machine, separate from the one running the regular e-Protector, as your backup environment. It needs its own e-Protector setup, following the steps below.
If a license is already registered on the PC you intend to use as the backup environment, a backup e-Protector cannot be used on it.
Request a backup certificate file
-
Download the Asprova My Schedule module from the official download page — see Download the module.
-
Run
MySchedule.exefrom the downloaded folder as administrator — see Run MySchedule.exe. -
Open the [Settings] tab of the WS Control Panel and press [Install] under the e-Protector item to install the driver — see e-Protector driver.
-
Access My Schedule with administrator privileges and select the [Server settings] tab.
-
Press [Manage license information], select [e-Protector] in the window that appears, and press [Next].
-
Press [Get fingerprint] to obtain the fingerprint file — see Get a fingerprint file.
-
Ask Asprova Corporation, through your distributor, to issue a backup certificate file. Your request must state:
- what you intend to use the backup e-Protector for, and
- the fingerprint file you created (for example
asfingerprintXXXX.v2c), attached.
Then wait for your distributor to send the backup certificate file.
Prepare the backup certificate file
Get the backup license ready ahead of time so it is there when you need it.
-
Save the backup certificate file you received (for example
aslicenseXXXX_backup.v2c) somewhere memorable on the backup PC. -
Access My Schedule with administrator privileges and open the server settings.
-
On the server settings tab, press [e-Protector] under the licensing method selection, click [Apply backup license file] in the window that appears, and select the backup certificate file (
aslicenseXXXX_backup.v2c) to apply it.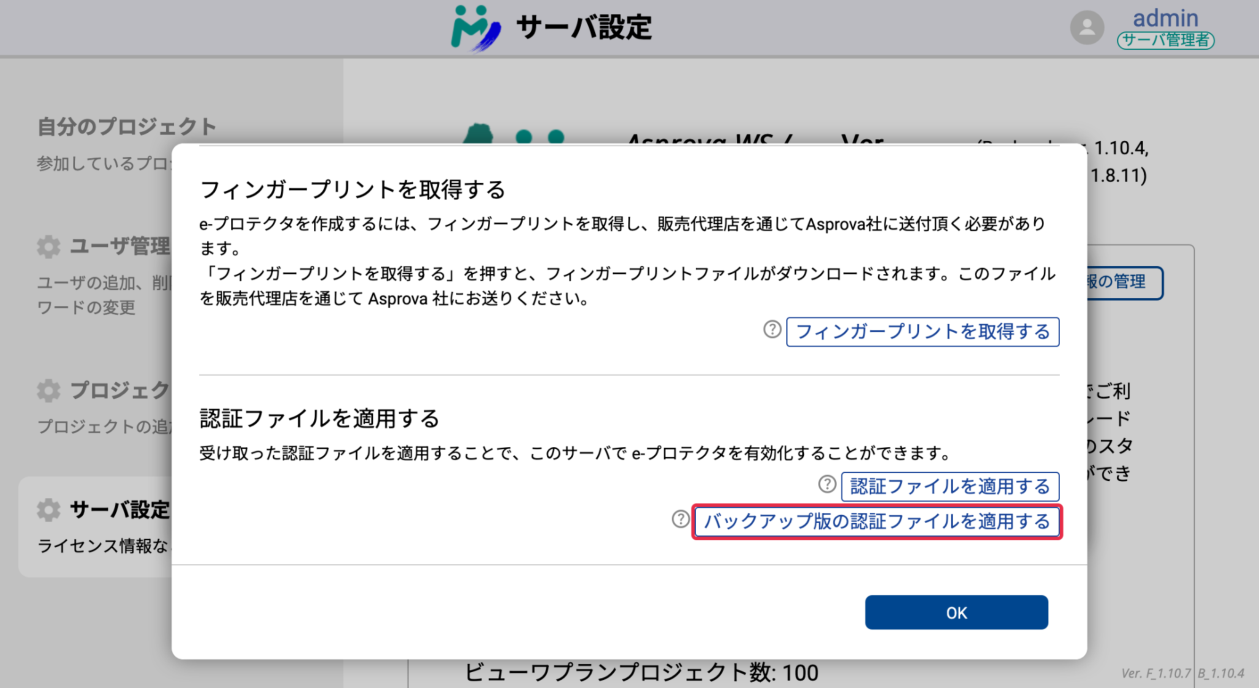
-
Once applied, the backup license is ready to be activated at any time.
Once activated, the backup license lets you use My Schedule without restriction for three weeks. Activate it only immediately before you actually start using it.
Activate the backup e-Protector
Click [Activate backup license] in the license information dialog. Clicking [Confirm] starts the backup license period.
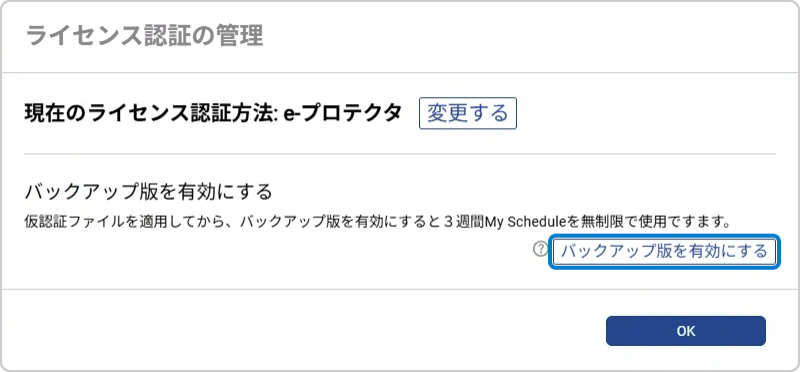
Extending or resetting a backup license. Contact us if you need to extend the backup license period, or return the backup license to its pre-activation state so it can be activated again. Both are done with a magic number, the same way as for a regular license.
More on e-Protectors
Online license
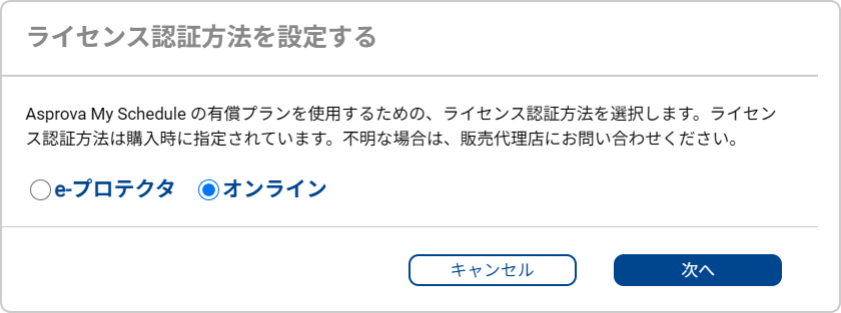
Press [Online] under the licensing method selection on the server settings screen.
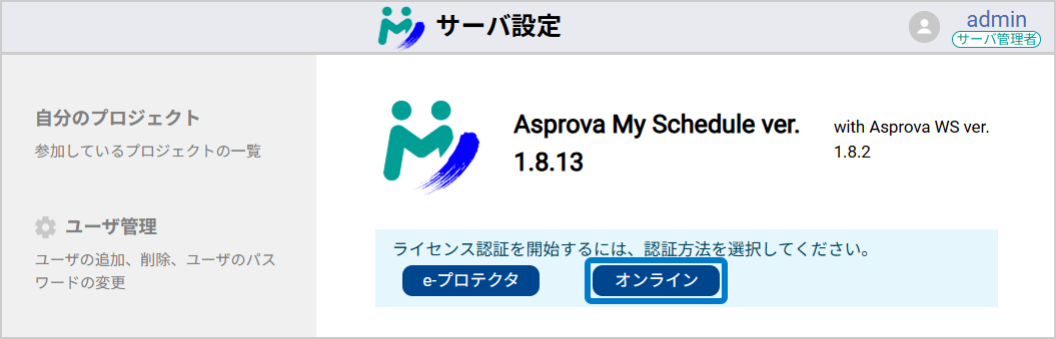
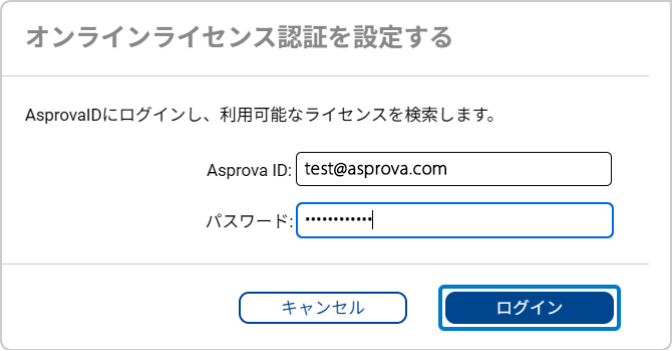
A pop-up window appears. Sign in with your Asprova ID. My Schedule then searches for the licenses assigned to that ID.
The available licenses are listed. Press [Select] on the one you want to use.
A (?) mark next to a [Select] button that cannot be pressed explains why — hover the pointer over it to see the reason.
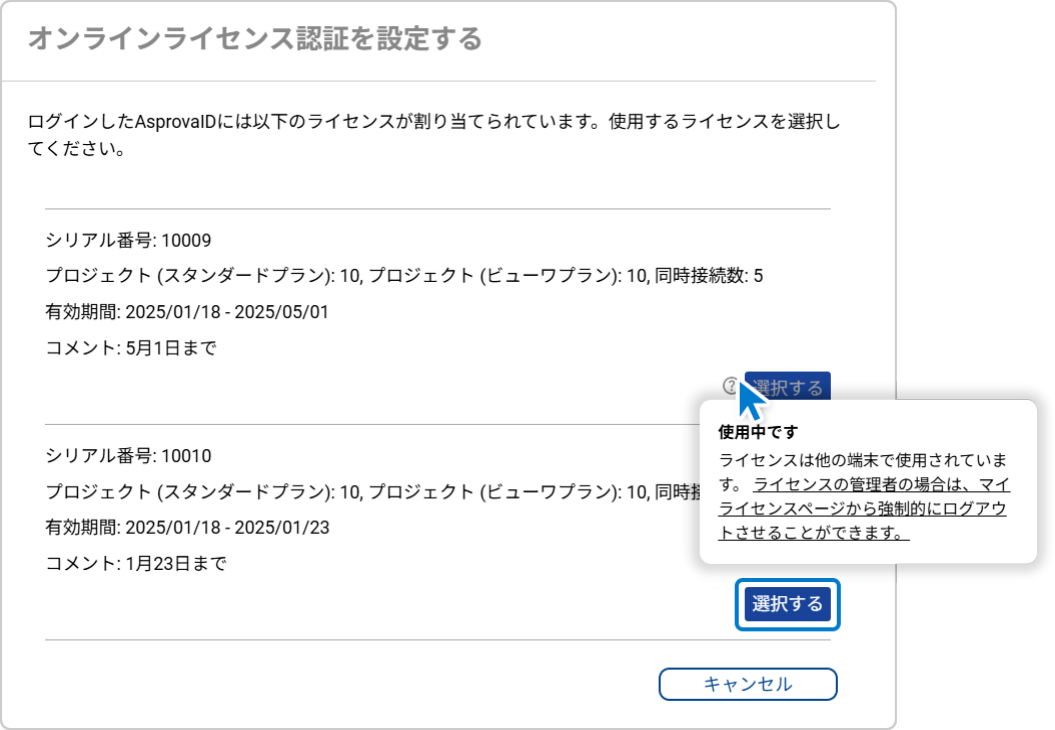
Once you select a serial number, the screen shows the plans available to you, the project counts, the concurrent-user limit and the license expiry — and My Schedule is ready to use under that license.
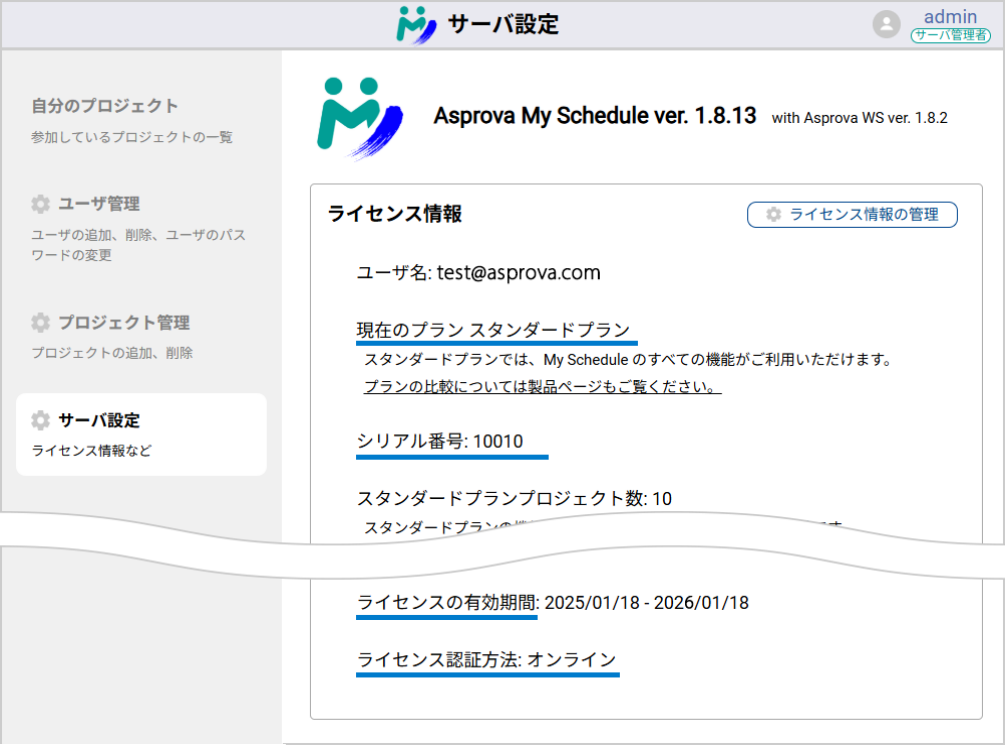
If you cannot sign in, see Online license problems.
Manage or change the online license
Press [Manage license information] at the top right of the license information to open the License authentication management pop-up, where you can release the license currently selected or change the licensing method.
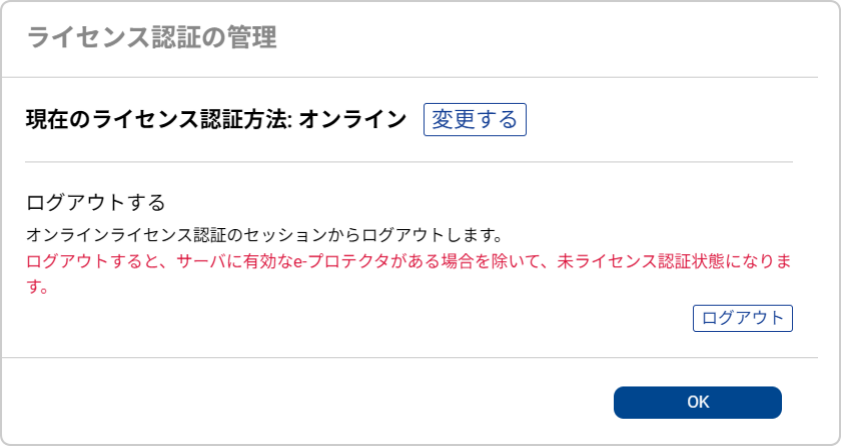
Press [Change] to switch between e-Protector and online licensing.
Press [Log out] to release the online license serial. Unless an e-Protector is set up, the server then has no license applied and only the Free plan is available.
Renewing an online license
Asprova My Schedule is licensed on an annual contract, and renewing the contract is all that is needed to keep using it.
After renewing, there is nothing to update in My Schedule or in the WS Control Panel. Check the My License page to confirm that the expiry has been extended.
With the server licensed, set up the data you want to share: Create a project.