Configure the Control Panel
Everything about how the server is reached — its address, its port, whether it runs as a service — is set in the WS Control Panel's [Settings] tab. Open that tab now and work through it.
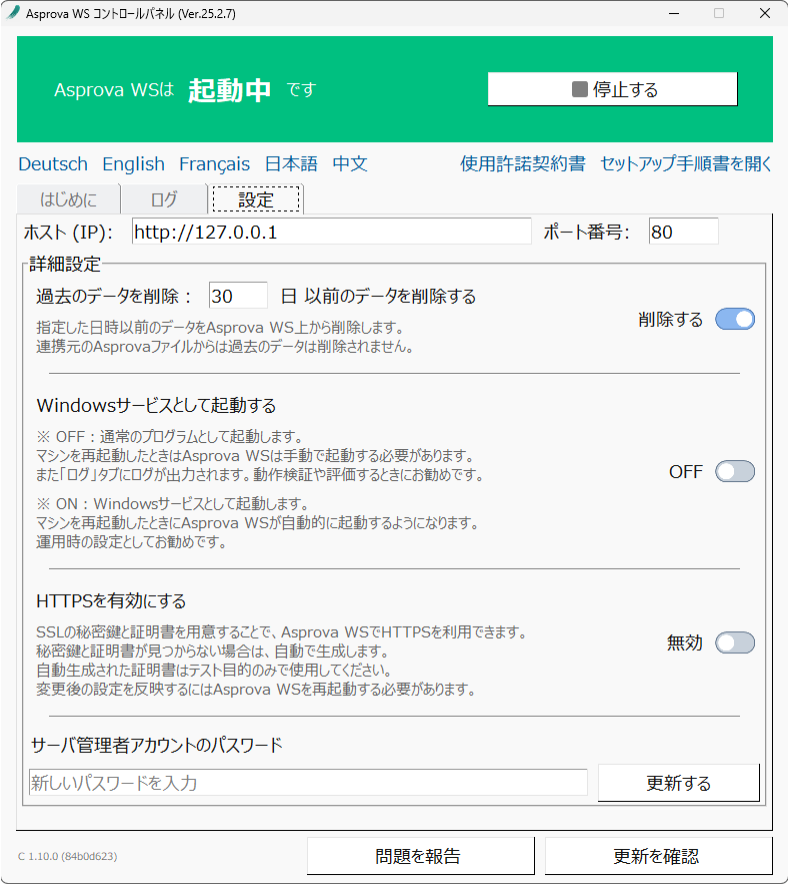
Host (IP)
Enter a host name or an IP address.
The http://127.0.0.1 that the Control Panel starts with is a special address meaning the PC I am
using right now. It is fine while you are trying things out on one machine, but nobody else can
reach the server at that address.
When you run My Schedule on a dedicated server, enter the host name or IP address assigned to that server.
Port number
The default of 80 is usually fine. If you cannot connect, set something other than 80 — 5001, for example.
Advanced settings
Remove old transactions
Removes transaction data older than the period you set — the results and capacity adjustments entered in My Schedule. The data in the source Aru file is left alone.
Launch as a Windows service
- Off — WS runs as an ordinary program. It has to be started by hand after the machine restarts, and its log appears in the [Logs] tab. Recommended while you are evaluating.
- On — WS runs as a Windows service and starts automatically when the machine restarts. Recommended for live operation.
Enable HTTPS
Name your SSL private key privatekey.pem and your certificate cert.pem.
Put both files in the AsprovaWS/ssl folder, at the same level as the MySchedule.exe you
downloaded in Install the server, then turn the toggle on. Create the
ssl folder if it does not exist.
If no private key and certificate are found, Asprova WS generates them itself. Use a generated certificate for testing only.
Password for the server admin account
Sets a new password for the server admin account. This exists so that you can get back in when nobody knows the password — the normal way to change it is from the web app, described under Sign in below.
e-Protector
If you are going to authenticate your license with an e-Protector, you have to install the e-Protector driver first.
Press [Install] under the driver installation item on the [Settings] tab.
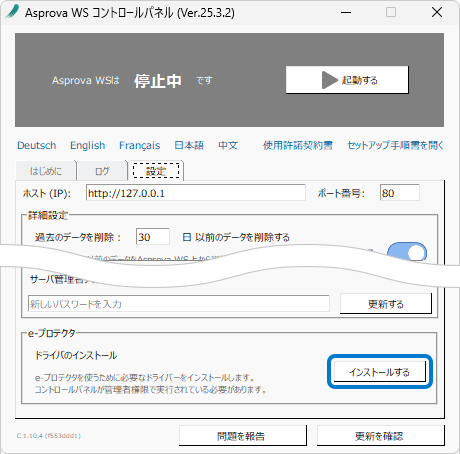
A progress window appears. The installation is finished when you see this:

Settings take effect when Asprova WS restarts. Stop it and start it again from the Control Panel before you go on to the browser — the Control Panel itself can stay open.
The one exception is the Control Panel's display language: changing that restarts the Control Panel, and if WS is not running as a Windows service, the server stops with it.
Connect from a browser
Take the Host (IP) value and the Port number value from the [Settings] tab, join them
with a colon (:), type that into a browser, and press Enter.
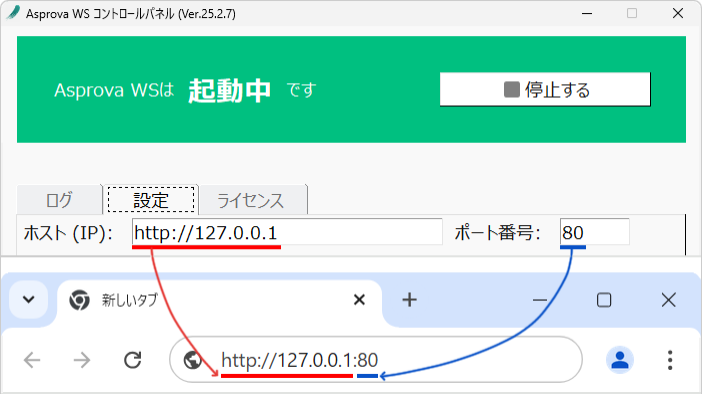
If you are using the default address (http://127.0.0.1), the browser has to be running on the
same PC as the WS Control Panel.
You are connected once the Asprova My Schedule sign-in page appears.
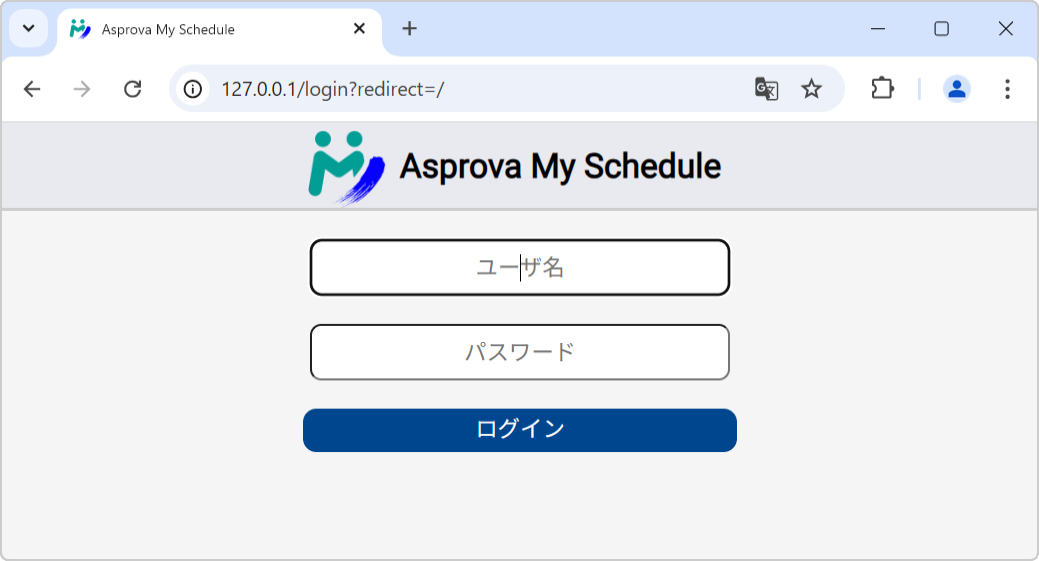
If it does not appear, see The sign-in page does not appear.
Sign in
Sign in with the administrator account:
| Username | admin |
| Initial password | *qkCMt4Ut5 |
This initial password is the same on every installation. Change it as soon as you have signed in: click your user name at the top right and choose [Change password]. Use the new password from then on.
If the administrator password is ever lost, reset it from Server administrator account password on the Control Panel's [Settings] tab.
If you cannot sign in, see Cannot sign in.
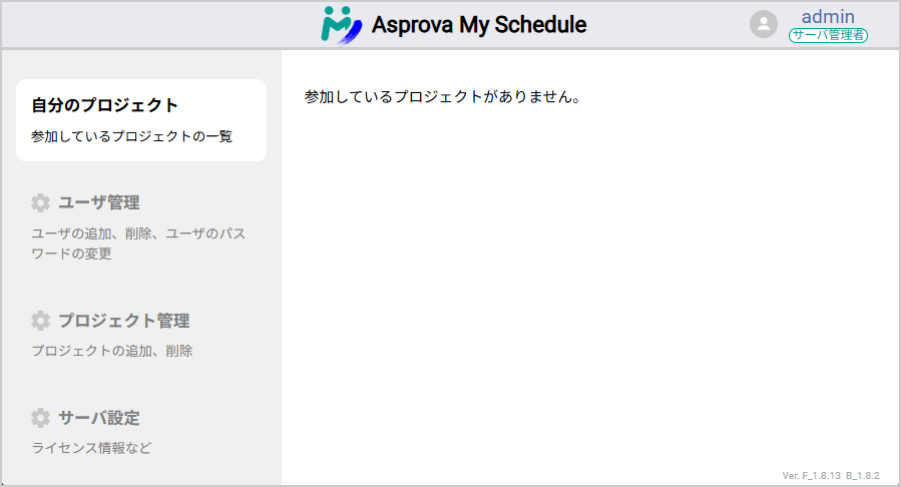
Once you are in, you see what the administrator account can configure.
Next, authenticate a license: Set up a license.