Connect Asprova
Uploading planning data from Asprova and downloading results back means installing the My Schedule plugin into Asprova and pointing it at the project you just created.
Install the plugin
The Asprova plugin is included in the My Schedule module folder you downloaded earlier.
Quit Asprova if it is running.
Inside the module folder, open Plugin → the folder for your bit count. It contains
AsMySchedule.dll. Copy that file into the same folder as Asprova.exe.
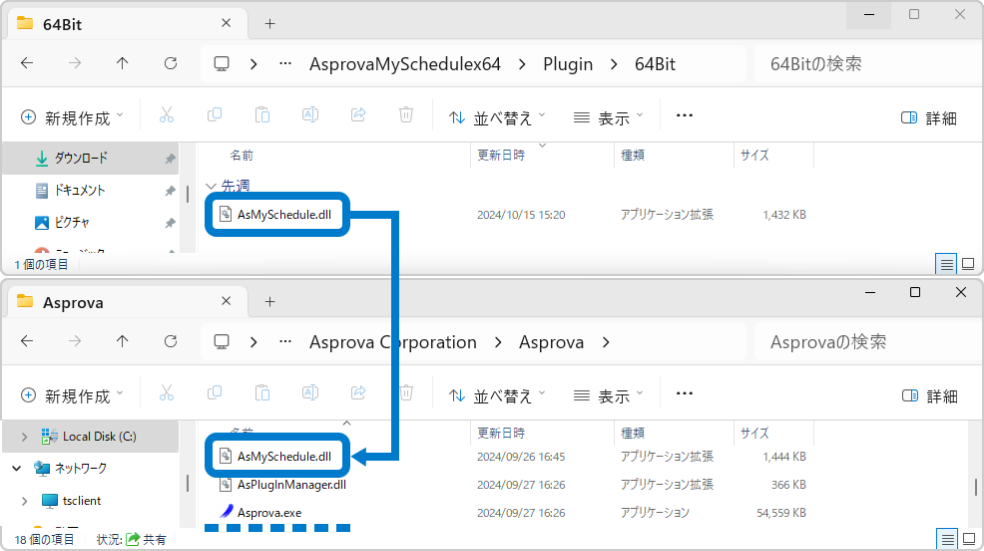
The plugin's bit count has to match Asprova's. You can check Asprova's version in its title bar — if it does not say [64bit], it is 32-bit.

If your Asprova is not the latest version, update it to ver.17.6.0.0 or later, the first version My Schedule can be used with.
Once the plugin file is in place, start Asprova as administrator.
Enable the plugin
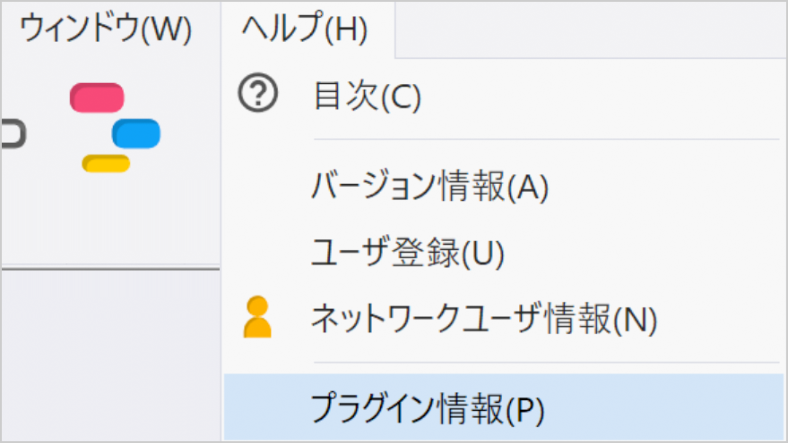
Run Help → Plug-in Information from the toolbar.
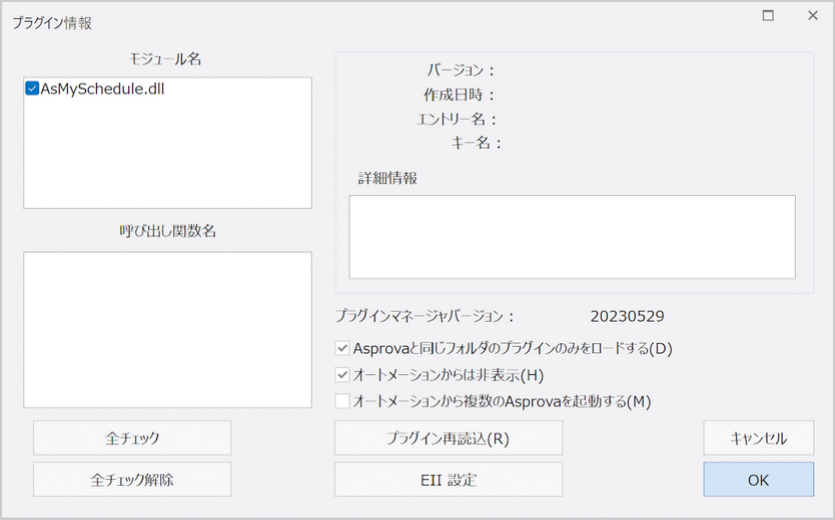
Tick AsMySchedule.dll on the left of the Plug-in Information dialog. Press [OK] to return.
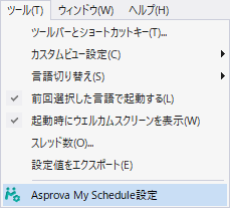
The plugin is installed correctly if a [Asprova My Schedule Settings] entry has appeared under Tools in the menu bar.
If AsMySchedule.dll is not listed on the left of the Plug-in Information dialog, check that the
plugin file is in the same directory as Asprova itself.
If the My Schedule entries do not appear in the menus at all, see The My Schedule menu entries are missing.
Configure the connection
With My Schedule running in the WS Control Panel, open in Asprova the project you want to upload, then choose [Tools] → [Asprova My Schedule Settings] from the menu bar.
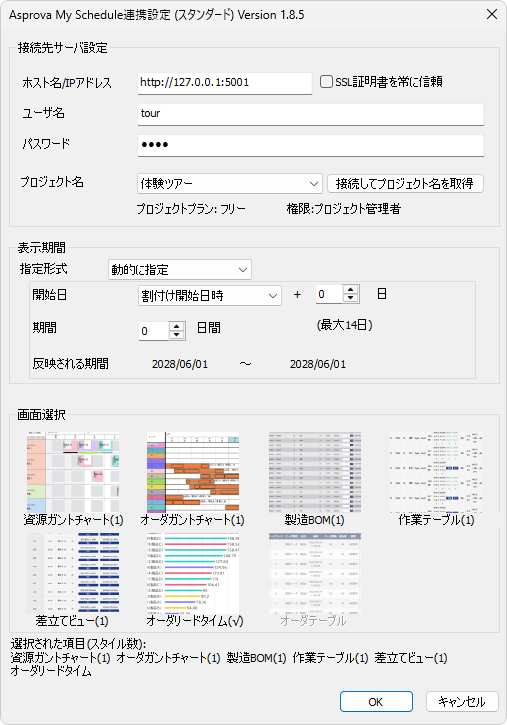
Fill in Server connection settings with what you configured in the WS Control Panel. If you are connecting over HTTPS, tick [Trust all SSL certificates] beside the host/IP field.
| Host name / IP address | http://127.0.0.1:80 |
| Username | admin |
| Password | *qkCMt4Ut5 |
If you changed the host/IP address, the port, or the password, enter what you changed them to.
Press [Connect and get project names]. A "Connected" message confirms the connection. If it fails, see The plugin cannot connect.
From 26.1.10 the plugin uses the system proxy settings automatically when it talks to the server. On earlier releases it connected directly. See Using a proxy.
Then pick the project you want to upload to from the Project name dropdown.

Bought the Standard or Viewer plan but only see the Free plan? See Plans and project limits.
Set the display period
Display period decides which slice of the plan is sent to the My Schedule back end.
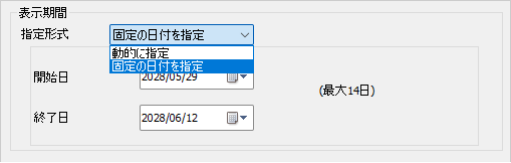
There are two ways to specify it.
Dynamic
Choose one of Assignment start time, Scheduling basis time or Display start time, then enter a number of days in the text box to its right.


The period each view uploads is defined as follows.
| View | Definition of the display period |
|---|---|
| Resource Gantt Chart | The operation's start and end times |
| Order Gantt Chart | The start time of the order's earliest operation and the end time of its latest |
| Manufacturing BOM | (not applicable) |
| Operation Table | The operation's start and end times |
| Dispatching View | The operation's start and end times |
| Order Lead Time | The start time of the order's earliest operation and the end time of its latest |
For example, with a display period set to 2024/01/01 – 2024/06/01, the Resource Gantt Chart uploads the data of operations whose start and end times fall between 2024/01/01 and 2024/06/01.
Static
Specify the period as absolute start and end dates, regardless of the assignment start time or anything else.
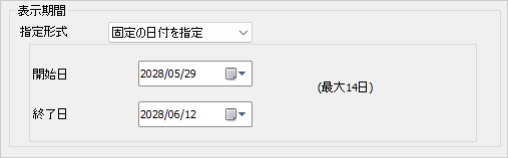
On the Standard and Viewer plans the display period is unlimited and you can set it freely. On the Free plan it is capped at 14 days. A display period must be set even when it is unlimited.
Choose views and styles
View selection is where you choose the views to upload. Select the same views you ticked in My Schedule's view settings.
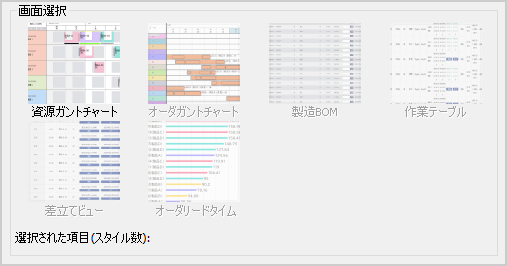
If the view you want is greyed out, see The view I want to upload is greyed out.
Clicking a view's icon opens a window for choosing which styles to upload. Select a style and press [Add >>].
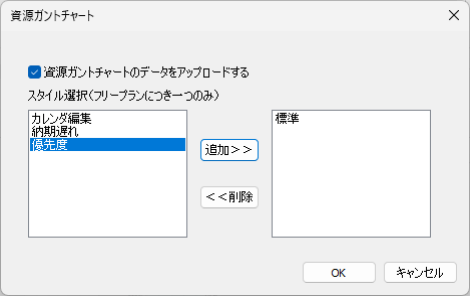
On the Standard and Viewer plans you can select several styles. On the Free plan only one style can be selected.
Press [OK] to close the connection settings window.
Upload the plan
Reschedule so that operations are assigned, then choose [File] → [Asprova My Schedule ▶] → [Data upload] from the menu bar.
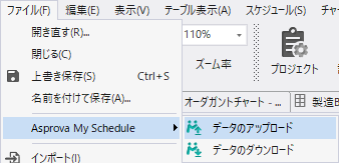
Uploading requires Project Admin or Server Admin permission. Accounts with result-input or read-only permission cannot upload. See Permissions.
See it in the browser
Go back to the browser and click the view icon in the project you added.
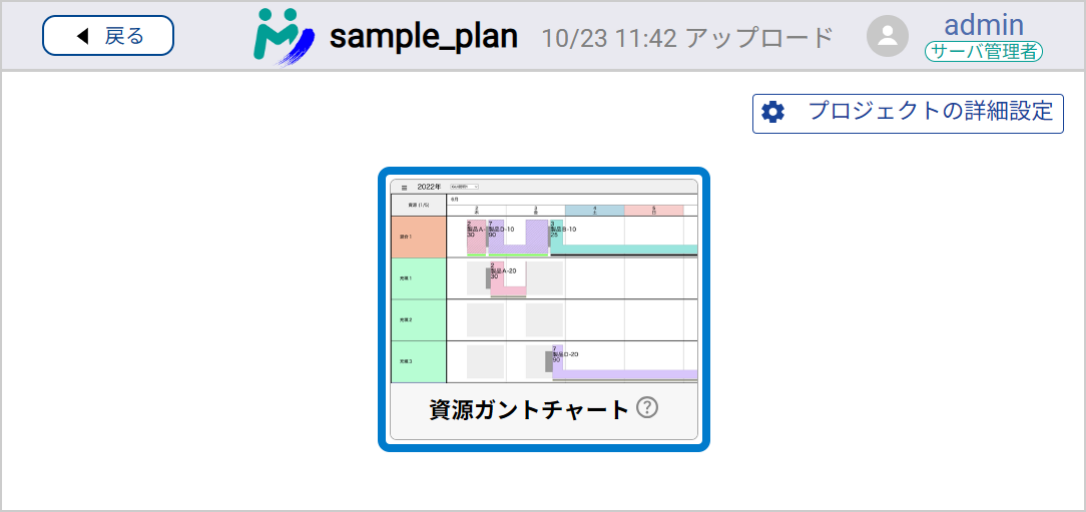
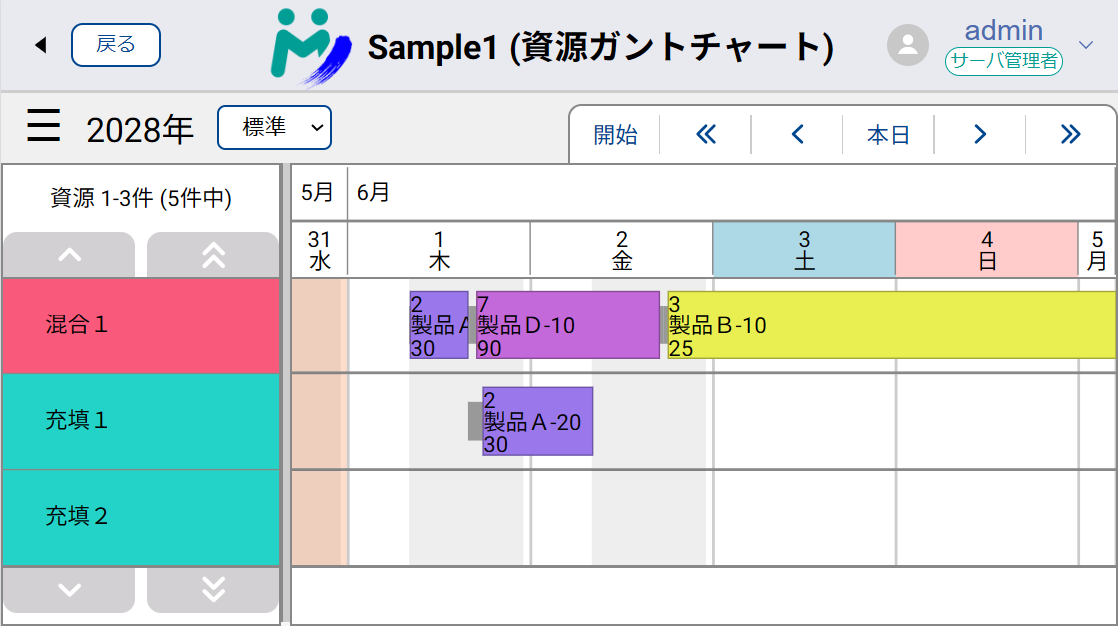
The Gantt chart appears in the same style as the planning data you uploaded.
A concurrent-user error instead? See Concurrent users. Style not showing as expected? See The style I selected is not displayed.
Next, enter a result and bring it back into Asprova: Collect results.